Showing posts with label pants. Show all posts

Sunday, September 10, 2017

Shirt Dress For A Bump

Here are a few more things I made for the growing belly this summer.  All of these were for back to work.  I've worn the shirt dresses a bunch of times already, but haven't worn the separate pieces at all.  The best part about all of these pieces is that they don't look like maternity clothes (I think?) and I definitely plan to wear them after baby is here.  The shirt dresses in particular will come in handy when I have to go back to work after giving birth.  Don't ask me why I seem so prepared for all of this baby business!  I'm really not.  At least I'm not prepared in any other aspect of life. But I guess my wardrobe is prepared.  Ha! I did get all summer to think about what to sew and then had the time to do it, so that helped.


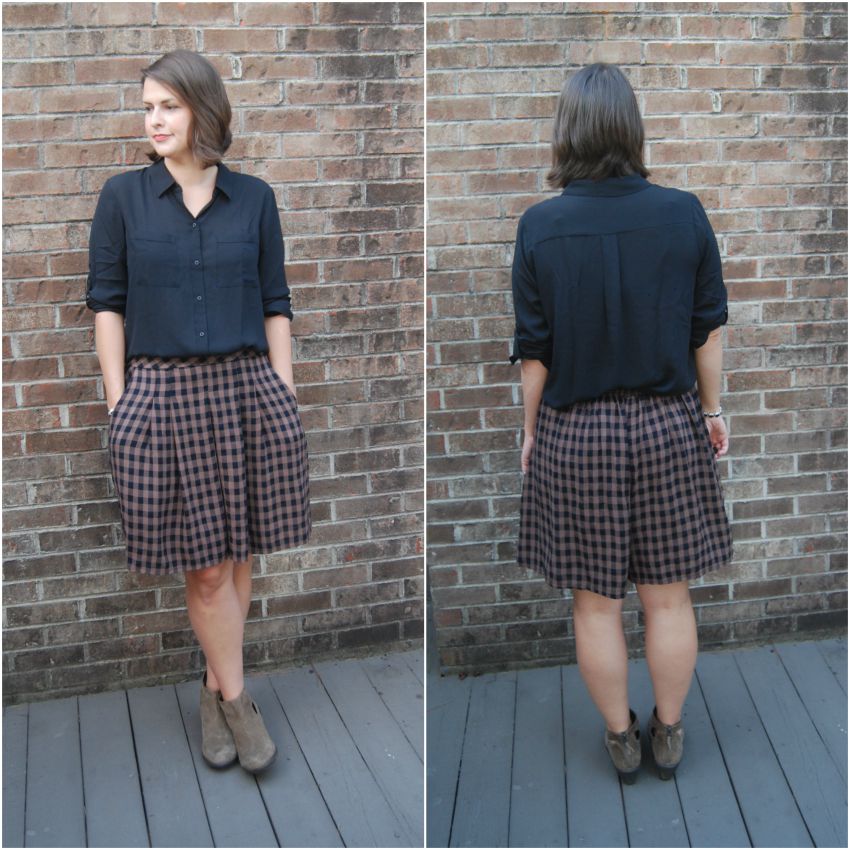
Pattern Description: The pattern is one I've made before, McCalls 7314.  In fact, when I blogged about this particular dress before, I actually noted that it would be a great maternity pattern.  And it is!  It's a typical shirtwaist dress but with a raised, curved waist seam.  It's perfect for a growing bump. And I will absolutely be wearing my very first version when the weather gets a little cooler (it's below).  I left the elastic out of the back waist in that version but I like how it looks with tights and boots. The sleeves are from a different pattern.


Pattern Sizing: 6-22.  I made a 14.  

Fabric Used: I made the navy, shibori print dress first.  It's a rayon poplin that I bought from fabric.com a while back.  I've seen many other folks with the same fabric and for good reason.  It's really nice stuff.  I think rayon poplin might be my favorite dress fabric.  It's got great drape but is way sturdier than rayon challis and totally opaque.  I made the black and white gingham version next.  It is a rayon challis I've had for a while, too.  The top version is a plain white rayon challis that I bought yards of when Hancock closed down.  And the pants are made from the leftover rayon poplin from my very first version of the dress above.  I'm trying to sew through some of my stash as my fabric closet is going to be new baby's closet.  I've got to downsize!  I'll make some quick notes about the pants at the bottom of this post. 


Alterations/ Deviations: The navy shibori print dress has almost no alterations except my standard square shoulder adjustment. I played around with the shoulder fit more on the gingham version (and the armscye), but honestly, I think the shoulders look better on the navy version.  I also played around with button placement on the gingham version but I like it better per the pattern.  The gingham dress is longer, too.  About three inches, I think.  I spent forever matching up the checks on the gingham when I cut out pattern pieces.  The bodice looks decent but there is a little slant to the skirt. Oh well.  It was not fun to cut out.  I made the blouse last.  It's okay.   I put the elastic in the back waist of both dresses but did not like it in the top version.  So I left it loose and billowy.  The top version seems to fit so much larger for some reason.   Maybe fabric choice- cheap fabric, looser weave.


Likes/ Dislikes:  I love both dress versions. The curved waist seam is just perfect for a belly.  I plan to wear both dresses after baby, too.  I'm hoping the buttons will make it nursing friendly.  Like I said before, the blouse and pants haven't been worn at all.  I think I like both pieces separately, but not together.  It's too much fabric to wear at once.  I'll wear the blouse with a skinnier bottom but I'll probably just save the pants for later.  You can't tell in these photos, but the blouse has fun buttons.  They are clear with glitter.


And just some quick notes about the pants:  They are Butterick 5893.  I made view A, the straight leg version with side seam pockets.  I cropped mine.  I also shortened the rise a little bit.  They have an elastic waist.  They feel nice to wear in rayon poplin again, but I'm not sure what sort of top to wear them with.  I'll have to figure it out.


Conclusion:  Great shirt waist dress pattern. Perfect for summer and also happens to be perfect for early maternity wear!   I took these photos the same time I took the photos for my last post.  So this is just a 15 week little baby bump.  It's getting bigger now.  I think it's time to look at actual maternity patterns and for colder weather, too.


Sunday, September 20, 2015

Ahhh! Culottes!!


Love them or hate them, right? Yes, the culottes zombies came for me.  And I've been bitten.  I seriously love all three pairs of culottes I've made.  I made the two shorter pair this summer and just finished the longer black pair.  They are all made from McCall's  7131.  I actually made the first black and red printed pair very early on the summer.  They have been worn almost every other day since.  And I think they've held up pretty well!  Despite using a fairly cheap rayon challis. 


 This pattern is a good one.  I would call these actual culottes, meaning they look like a skirt but aren't.  A divided skirt.  I have seen other patterns called culottes that I would probably call wide leg pants.  But the pleats and the width of each leg on these put them firmly in the culottes category in my book.  Now that I've made this same pattern three times, I think it's time to review it.


Pattern Description: Loose fitting pants have front waistband and pleats, back elastic casing and side pockets.  Different hem lengths in pattern, including very short and very long.

Pattern Sizing: 8-24.  I cut a 16 but ended up using the back elastic guide for a size 12.


Fabric Used:  My first black and red version is a rayon challis.  The brown and black check version is a mystery rayon blend I thrifted a long time ago (with crinkle-- ugh).  And the black version is a crisp rayon poplin.  Which I struggled with.  There is quite a bit of puckering along my seam lines in the rayon poplin.  I am guessing I needed to adjust stitch length or maybe use a different needle?  Maybe a microtex needle?  The puckering looks very noticeable in these photos but I don't think it's as noticeable in real life.  I'm wearing them anyway.  I'm hoping those seams will loosen up a little with some wearing and washing.  The fabric has great drape but the weave is a lot tighter than regular rayon challis.  It's very opaque.  The back view is not the best in the crisper rayon poplin, also.  I did an extremely mediocre job of matching prints and checks on my first two versions.  So don't judge me.  My red and black version are ok, except for that one stupid mismatched stripe on the front.  Hasn't stopped me from wearing them, though.  The brown and black check fabric has a crinkle to it which caused all sorts of issues when matching up plaids.  I did my best.  My pleats match pretty well but my hem is off from front to back.  The outside leg seams match but the inside leg seams don't.  I swear that crinkled fabric was just messing with me. 


Alterations/ Deviations: None, other than using a smaller elastic length.  I tried the original elastic length and the waistband was much too loose.  The first black and red version is the length of view B.  So imagine how short view A is!  The brown and black pair is view B again with about two inches added to length.  And then the black version is view C minus two inches.  


Likes/ Dislikes:  This pattern has a lot of great design features and is easy to make with the elasticized back waistband.  There is one front pleat that is done after sewing up the front center seam which helps hide the pants leg split.  I think this might be my favorite feature and is what makes them look so much like a skirt.  The back waist casing is done by sewing four channels for narrower elastic instead of one big piece.  I like this, although it is very fiddly to feed all four pieces of elastic through.  Kind of a two steps forward, one step back process.  I tried to get a good shot of where the front waistband meets the back elastic casing.  I like how this is sewn as well.  The pants are totally constructed with side seams sewn last.  I like the way the waistbands are sewn together with the front waist facing.  It's a nice clean finish inside.  I'd explain it but I think I'd just confuse people.  My only complaint with this pattern has come after viewing all these photos.  I did get the feeling that the front hem would dip lower while wearing these.  I figured it had something to do with tightening the back elastic and having all those pleats in front.  However, I have noticed on all three pairs that my side seams pull forward.  Can anyone tell me why?  Is it a fit issue?  Or just a feature of the way the pattern is drafted?  It doesn't bother me enough to not wear these.  I do tend to readjust the back elastic casing throughout the day and pull up on the front waistband to keep the front hem from dipping lower.  The front, with all the pleating, is heavier than the back if that makes sense.


Conclusion:  Great pattern!  I'm saving this (I folded it back nice and neat!) to revisit next summer.  I really did wear the first version to death.  They were perfect for hot summer days.  And I know the black version will get worn plenty this fall.


Wednesday, April 1, 2015

Can't Touch This

Y'all.  I made hammer pants.  And I love them.


And no, this is not an April Fool's prank.  Now I know that these will not be everyone's cup of tea.  But these pants are awesome.  Awesome, I tell you!  Don't hate.  Whether I look like a tragic fashion victim or not, I am digging the breeze.  


I made harem pants.  I think I probably snorted my drink the first time I read that harem pants were a thing.  What was that, last summer maybe?  I am, like always, late to the party.  I usually pick up on a trend when it's no longer cool.  And to be fair, I am not a fan of the drop crotch.  But there is something about harem pants that drew me in.  I think I like the laid back, bohemian vibe.  I came across this Sandra Betzina pattern (Vogue 1355) while browsing the Vogue catalog during the last pattern sale and immediately purchased it, along with a cheap poly knit to test it out.  I like that this particular pattern had the drapey genie leg but without the drop crotch.


This wacky version is my wearable muslin.   I made no attempt at pattern placement or matching since I was really just trying to figure out if I could pull it off.   The pattern placement is not too unfortunate, I think.  My muslin is a size D with no changes.  This pattern is dead easy.  Three pieces, three major seams.  There are two darts on either hip.  It was a super quick sew.  The waistband uses negative ease instead of elastic-- like yoga pants.

After my muslin, I made the black pair out of the softest bamboo knit ever.  I ordered several yards of this bamboo/rayon knit from fabric.com and I don't think I'll ever be able to use cheap knits again.  This is seriously nice stuff.  It is soft and drapey but also opaque.  And being opaque is high on my list of priorities when making a bottom.  I actually looked for a suitable knit at Joann's before ordering this stuff but everything there was too see-through.  Anyway, I have already ordered more bamboo knits from fabric.com.  Hopefully they will hold up over time.


The only change I made to the black pair was to add 1.5 inches of length.  That's it.  Fun, easy pattern.  In case you are wondering, both pairs are really just intended to be lounge wear at home.  I am still toying with the idea of maybe wearing the black pair out and about, but I need to figure out something to wear on top.  They are a little bit ridiculous, I know.  J likes them.  He said they bring back good memories of his zubaz pants.

Friday, March 7, 2014

Crawling Baby Pants


What do you do when you have a crawling baby and nothing but hardwood floors in your house?  Make some crawling baby pants--- with padded knees!


Baby Jane has been crawling around for a while now.  But when she first started crawling, her little knees would get so red and raw.  In fact, after her first big day of crawling I noticed that she took it easy the next couple of days because her knees hurt.  We have a couple of big area rugs in our house, but otherwise it's all hardwood.  Pretty tough on little baby knees.  My mom and my aunt both bought her an adorable pair of knee pads.  I don't have a picture of them, but the actual knee pad looks like a piece of foam (or maybe neoprene?) and they are attached to a knit tube.  They have some grippy stuff printed on them, too.  Anyway, the knee pads were so perfect for this newly crawling baby that I decided to sew her some pants with knee pads sewn on.


I made five pairs but I tweaked them a bit with every pair.  The first couple pairs I made aren't great.  I changed around how I sewed the knee pads.  So bear with me while I post a picture of each and talk about the pads.  I want to remember what worked best in case I decide to make some of these again.  Which I might.


  I used this baby legging pattern by Melissa Esplin.  I shortened the legs and rise a little bit. The legs were really long, even on my long baby.  And I shortened the rise because I added a waistband.   The picture above shows the first pair I made.  The pads are made of two layers of fleece with one layer of quilting cotton on top.  I basted the layers together and then serged the edges.  And yikes, these knee pads are homemade looking.  It's really hard to serge a round patch, too.  Hence the pointy bit on one of the patches.

Pair number two is two layers of fleece with one layer of flannel on top.  Rather than serge the edges together I decided to bind the edges with some rib knit.  My stitch-in-the-ditch could use some work, I know.  I didn't like this pair at first but they have become the most worn pair of the bunch.  The patches are extra soft and squishy.   I should also mention that there is elastic in the waistband.  I tried a couple pairs of these leggings with just a knit waistband (like a yoga waistband) but found that they really needed the elastic to stay up.  Jane managed to crawl out of a pair that didn't have elastic in the waist.  The cuffs are just a knit band.


Pair number three I used one layer of fleece underneath some crazy fluffy minky.  Instead of serging or binding the edges of the patch, I zig zag stitched over the edges.  I sewed this pair in a hurry.  I was sewing while listening to baby Jane on the monitor stirring from a nap.   Nothing makes me panic more.   Just one more seam, baby please.... :)  There are some puckers around the patch that I'm not happy with.  As a result, this pair hasn't been worn yet.  But I think the fuzzy patches are pretty cute.


 The last two pairs I feel like I got it right.  The patches are only two layers.  The black patches are just two layers of black fleece.  The striped patches are self fabric with one layer of fleece underneath.  The patches are sewn on with a zig zag stitch set with a smaller stitch length.  I also rotated the position of the patches towards the outside of the knee.  I noticed on the other pairs that the patches ended up sitting slightly inside of the knee after some crawling around.  Not sure why.  Using a stretch fabric for all layers of the patch made a difference, too.  Both pairs are made from the same fabric, some sort of reversible knit.  Dots on one side, stripes on the other.


Can I just tell you how hard it was to get pictures of baby Jane for this blog post now that she's mobile?  It was nearly impossible.  I had to get her attention with kitchen items.  She doesn't sit still for her toys anymore.  It takes something new to pique her interest.  In this case it was the salad spinner.  And even then she only stayed in one spot for a moment.  Gone are the days where I lay my sweet little baby down on a blanket and snap two hundred photos.  She's on the move.


To prove it, check out this stop motion video of crawling baby pants in action.  It's pretty darn cute.   A good way to remember this crawling phase down the road.  Baby Jane is ten months old now and she's just the sweetest thing I've ever laid eyes on.  Can you guess why her first word is kitty?


Monday, March 26, 2012

You Are Not Alone

 Booyah, pantalones.

Don't adjust your monitors, my friends.  These really are hot pink, pleated linen pants.  
Hot. Pink.

I bought this linen last summer.  It was described as "coral" when I ordered it online.   I was a little shocked when it came.  Not that I don't like hot pink, but it just wasn't what I expected.   I guess the color could be considered coral.  Maybe electric coral.  I decided it wouldn't be too huge of a loss if I failed at my third attempt at pants (fourth? fifth? I've lost count).


Now before you go all congratulatory on me, I want to you to know that I was not alone in the making of this hot pink wonder.  I had help.


Do you know StephC over at 3 Hours Past the Edge of the World?  Well, after my first rant on how difficult pants are, Stephanie sent me an email asking if I would be interested in testing her custom pants block service.  Yes, that's right.  She was asking me if I would help her test her service.  I asked if she had the 'who was helping whom' mixed up.  We all know I needed some major pants fitting help.

The service works like this: You send Stephanie your measurements.  She drafts you a custom pants block, basically a wide leg pair of bermuda shorts.  I'll spare you the muslin photos (or spare myself).  You email back and forth for a bit and fix some fit issues.  Then, you use your pants block to alter existing patterns.

These pants are from Simplicity 2477, which is out of print now.   I made view A.  I was super impressed with the pattern, which is not usually the case with some of the Simplicity patterns I've sewn before.  I thought it was drafted really well.  I decided on the pleated version which is so unlike me.  I don't think I own a pair of pleated pants, other than the wide leg ones I made a couple of summers ago.  That was a lucky make, by the way.  I was swayed by the illustration on the front cover.  In this linen, I imagined these to be long, fun and flowy- more of a palazzo silhouette.  I think they ended up long and fun, but more of a classic trouser silhouette.  The legs are pretty straight.  I left off the faux flap and added a couple of belt loops at the center back.  I also underlined every piece with some cotton broadcloth I had in my stash that just happened to be the exact same color.


Anyway, I used the pants block Stephanie so kindly drafted and fixed a few things before I made these up.  No muslin, my friends.  Just some careful prep.   If I was a good blogger I would have taken a picture of my pants block versus the pattern.  But I didn't.  So you'll have to take my word on the changes I made.   There wasn't a huge difference in the crotch curve.  The pattern was pretty close to my block.  But I did have a bit of an extension on the back crotch curve.  According to the block I needed to go up a size then make some major changes above the hip.   I changed the side and center back seam the most above the high hip line.   I totally changed the shape of the side seams.  And I took in the darts about 1/4" each.  I also angled the center back seam quite a bit.  Essentially I created another dart at the back, I just did it while I was sewing the seam.

It's not completely perfect, but it's close, right?  I see some wrinkles in the back view photo above.  Some of those are due to my shirt being tucked in.   The only issue that still bugs me a bit is some extra fabric at the center front seam.  I took in the back seam so much above the hip that I think I probably needed to angle the front seam in some.  Only there's a fly there.  Hmmm.  There will always be things to improve on.  But I'm not going to let that rain on my hot pink parade right now.


Originally I sewed cuffs at the bottom.  But I didn't like the length.  So I took the cuffs out and hemmed them loooooonnng.  I have to wear some pretty substantial heels.

One more bit of awesomeness about these pants- I used Debbie Cook's jeans fly tutorial. How freakin' amazing. If you haven't tried her method yet, do it. You'll be astounded at how fabulous your fly turns out. I pestered J about a zillion times to check out my fly after I sewed it up. He didn't understand, but I know you will. I'm not even embarrassed about my fiddly stitching above. Or my mismatched zipper.


There it is!  I feel like I can at least credit myself with one win against pants making now.  I can see these in the heat of summer with a blouse-y tank top.  I'll have to make one of those.  I think I may even try wearing them more beach bum style with flip flops.  I can roll up the hem.  They are linen after all.  I'll have to embrace the wrinkle.

Woot woot!
Hope everyone has a great week.